
Friday, 21 June 2013
Tuesday, 18 June 2013
Evaluation of FMP
After being so ambitious with my ideas at the beginning of my FMP, I have now made something that was affordable in terms of budget. My first idea was unrealistic because I was too ambitious, it was a full body cast in a perspex box/tank, I had to abandon this idea due to budget limitations. I then went through a stage where things wouldn't fit in another idea I had, of jars, so I had to adapt my FMP again. I simplified my idea and made three casts of three different body parts to put in three different sized fish tanks, which I sourced. I planned to have three face casts, three foot casts and three clenched hands in three tanks filled with water. The process of making these casts were messy and a bit hit and miss at times until I got the consistency of the plaster and alginate right. I was constantly covered in plaster, alginate and water throughout the journey of making and displaying the piece, this was the only down fall, the mess.
I have had trouble getting plaster hands out of alginate in one piece at times, so I thought clenched would be more efficient, as the fingers wouldn't get damaged. I was quite happy with how my hand cast used in the final piece had developed, although for one of them I didn't have enough alginate made up to get a full hand cast, so I ended up casting half a hand this has turned out to my advantage, as the piece seem to line up in height order now.
Doing my three year old niece's feet was a nightmare, it turned out that college had ordered the wrong alginate, which didn't set for over three minutes; I thought it was the quick set alginate that I had been using for the past year, I realised that this was not the case when I read the packet. To keep a three year old in one spot for over three minutes was near impossible, but I did manage to get two casts for my piece to choose from. These casts turned out with air holes in most of the feet. I mustn't have got the air out from these casts when pouring plaster in moulds but it's one thing to work on in future casting.
Casting the face was the messiest job of all, my clothes got covered in plaster and alginate, next time I will wear a protective sheet. When I was having my face cast I didn't like having straws up my nose, so I had to work on getting alginate in correct places on the nose holes before pouring plaster in the mould, but I didn't have the right tools, so I filled the nose in with my finger, it isn't perfect but it is adequate. If I could go back and change the method of creating the nose I would, all the other face casts have defects too but it all works with my idea of people "picking at" themselves for flaws, so I was excited when removing the alginate to find that the casts had defects.
A teacher from college has lent me a small tank for my exhibition and I have sourced the other two, I found one on preloved and the other a friend of my family has lent to me. I have used the tanks as my water containers, because the glass reflects my casts with the water, which makes it seem like you can see more casts than there are. I like this method because the reflections make the objects appear even more distorted.
I think my final piece looks effective for what I am trying to portray with people being so critical about themselves. There are always parts of the body people hate because of the influence that the media has on peoples self image, if you look in a mirror to long you will end up "picking yourself to pieces." Nobody seems to think they are perfect or "good enough" in this day and age, lots of people have a warped image of themselves because of this. Not everyone sees the flaws that you see in yourself, you are your own worst critic. In my piece the water will warp the casts, so it'll make them look different, I think this is how people see themselves against the critical world or what the media says.
I'm really delighted with how everything has come into place and look forward to the opening exhibition night.
Proposal
Coby Flannery
Pathway: 3D design
Personal ID: 32866
Learner Number: 42973
Proposal
Review
I explored several ways of casting and making
moulds, which included alginate, plaster, clay, mud rock and wax. I have learnt
the limitations of the process throughout this experimental stage, facing
issues such as not making the plaster thick enough and getting the alginate
stuck in a jug. I have also made one silly error of not putting Vaseline on my
moulds once and pouring plaster into it, this mistake I'll never make again.
All these casts and making moulds will help me develop onto my final piece, in which
I intend to cast different body parts and experiment with ways of encasing
them.
Ideas and concept
In casting different parts of the body I am
exploring the idea of how we judge our bodies in contemporary society. That is
how people see themselves in a very critical world, say that you look in a
mirror to long you'll find things wrong and pick yourself to pieces. To develop
this further I intent to experiment with the effects of water as a force that
visually warp the casts. So distorting the body parts which relates to
how people see themselves these days against the ideals that the mass media
bombard us with. With research, experimentation and the diverse potential this
project will definitely see me through.
Contextual research
My initial my contextual reference are Marc Quinn whose work
explores the ‘distanced relationship we have with our bodies, highlighting how
the conflict between the ‘natural’ and ‘cultural’ has a grip on the
contemporary psyche.' Similar issues to what I intend to explore. Another
artist that I have looked at because I want to do some form of sculpture in
water was Jason Decaires Taylor. He does under water sculptures that transform
as the water weathers the piece, as one bit decays the ocean brings it to life
with bacteria and plant life. His work has really inspired me
to experiment with my ideas of underwater work, I love the
decomposing of the pieces and sea life covering them but still giving them
their silhouette of a person.
Techniques and
presentation
I have explored lots of different casting
methods and decided to use mainly alginate for my project this time, as it is
the most effective for what I want to achieve.
Most of the material I'll be using, college will already have, such as plaster,
alginate and mud-rock. If the college doesn't have certain things I will go out
and find them, like tanks or jars. A cafe is giving me jars for free as it
saves them putting them in the recycling, when I can recycle these in my art. I
want to present my final piece well lit within a gallery surrounding.
Evaluation and
progression
I have been writing a blog to evaluate my ideas, work
and research throughout the course. Also the practical process will define my
outcomes so this will also be an important part of my evaluation. Finally I
will discuss my ideas with my tutors and peers and get feedback as to my
progress and potential development.Sunday, 16 June 2013
Exhibition installation
Throughout the past few weeks I have helped out with the installation of the exhibition and cleaning. I cleaned floors, sides, walls with watered down bleach and other cleaning a equipment, such as sponges and cloths. I then went on to paint plinths and sort out my area for the exhibition, after my area was covered I put my previously painted plinths over the taps, so I have a flat surface to work with.


Bibliography for research
Books and magazines-
1. Peter Murray, 2011. Jaume Plensa. Edition. Yorkshire Sculpture Park.
2. Saatchi gallery magazine, issue 21 spring 2013, page 57.
Pictures, videos, quotes and information-
1. YouTube, Alex Rawling. Casting a Hand Using Alginate, Uploaded on Sep 12, 2011
http://www.youtube.com/watch?v=O3Ow2FAWvKI
2.YouTube, brickintheyard. Mold Making and Casting: EZ Flo 60 resin cast into alginate, Uploaded on Apr 12, 2010
http://www.youtube.com/watch?v=cxJxoOq-9Vw
3. YouTube, brickintheyard. Uploaded on Jul 2, 2009http://www.youtube.com/watch?v=dRfuuUrgv8o
4.Magdalena Abakanowicz, http://www.abakanowicz.art.pl/about/-about.php
Pictures-
1. SEATED FIGURES, 1974-79, figures: burlap and resin, pedestal: steel Eighteen pieces, each figure ca. 104 x 51 x 66 cm each pedestal: 76 x 46 x 22 cm whole sculpture: 145 x 47 x 75 cm. Sydney Lewis Collection, Richmond, Virginia Second group in Muzeum Narodowe, Wroclaw http://www.abakanowicz.art.pl/seated/seated10.php
2. Recent works- AGORA 2005-2006, iron 106 figures 285-295 x 95-100 x 135-145 cm Permanent installation in Grant Park, Chicago. http://www.abakanowicz.art.pl/permanent/agora2ok.php
5. Adam Beane Industries, sports stars, picture 18. http://www.adambeaneindustries.com/sports-stars/
6. Jaume Plensa,Yorkshire Sculpture Park. Nuria, 2007, stainless steel, 400 x 400 x 300 cm and Irma, 2010, stainless steel, 400 x 290 x 390 cm. http://jaumeplensa.com/web/media/k2/galleries/201/17-york.jpg
7. Mathilde Roussel, Lives of grass, Photographed by Matthieu Raffard. Exhibited in 2010. 7th picture down on http://www.mathilderoussel.com/index.php/works/lives-of-grass/
8. Mass hand art pictures used. http://www.malcolm.id.au/gallery/d/29707-2/IMG_1001.JPG , http://farm4.static.flickr.com/3414/3335537095_b8e1c42602.jpg , http://pchsartbeat.weebly.com/uploads/5/9/9/8/5998062/2030934_orig.jpg.
9. Jason Decaires Taylor, The silent evolution, Depth 8m, MUSA Collection, Cancun/Isla Mujeres, Mexico http://www.underwatersculpture.com/sculptures/the-silent-evolution/
10. Marc Quinn, I quoted paragraph two, first sentence from http://www.marcquinn.com/biography/ and looked at work from http://www.marcquinn.com/exhibitions/ The Selfs, Solo Exhibition, 08 June 2009 – 19 July 2009, 23rd exhibition down the page.
11. Specimen jars.
1. PICKLED PUNKS – MARVELS UNDER GLASS, 2007 – 2008, J Tithonus Pednaud. http://thehumanmarvels.com/96/pickled-punks-%E2%80%93-marvels-under-glass/deformity
2. Berlin's Museum für Naturkunde website, Embryological Collection, last update on 21/05/2011.
http://www.naturkundemuseum-berlin.de/en/sammlungen/zoologie/embryologische-sammlung/
3. End picture from Berlin's Museum für Naturkunde website, http://www.naturkundemuseum-berlin.de/en/ausstellungen/the-wet-collections/?Lightversion=0%3Ftypo%3Ftypo%3D2%3Ftypo%3D0%3Ftypo%3D0
12. I got infomation from Dr. Hagens website about plastination , the processes and Gunther Von Hagens (himself) http://www.bodyworlds.com/en/gunther_von_hagens/life_in_science.html and used the third picture down on http://www.bodyworlds.com/en/prelude.html .
Saturday, 15 June 2013
Final piece!
About my final piece
After all the experimentation and research I have decided to make several different casts in three different sized tanks. The casts I have chosen to put in the tanks are three clenched hand casts, three face casts and three foot casts: the foot casts are of mine, my little niece and my mum. I shall put them in descending order of size on a slant, so that they look good and fit nicely in one of the bigger tanks. I will also be putting the face casts in the other big tank. The bigger tanks will be put on two plinths/boxes; the smaller tank will have my hands in it, not on a plinth but in-between the two bigger tanks, eventually I will fill the tanks with water, more near the time of the exhibition and use spot lights to enhance the piece.
Thursday, 13 June 2013
experimentation towards FMP
07/11/2012
First attempt at clay and plaster casting
I had a talk with Kim about different ways of getting a mould in different materials and she guested I try putting my hand in clay to make a print and using plaster of paris for making a cast of it. I had a trial run and I think it turned out OK. So I'm going to experiment with my hand in different positions and see how that goes. I loved making them, so more is definitely on the cards. Hopefully next time they will turn out even better, to do that I'll have to make a more neater barrier against the plaster, maybe out of wood or other materials.


12/11/2012
Clay and plaster casting
I did a lot of plaster hand art on this day. I pressed my hand in clay to make a mould, then poured plaster of paris into it. I liked the finished product, so decided to leave them as they are. I found it fun but the clay could do with being a bit softer to get a deeper mould, I was very happy with how they turned out. Although I want to get more of my hand in a mould, which you can't really get with clay pressed moulds. I have done some with fists and others with my hand in different positions, I did this casting to experiment with different materials and to help develop my skills.
My work


05/12/2012
First alginate casting
After seeing the alginate way of producing moulds from YouTube channels such as brickintheyard, I thought I'd have a go at it. As I wanted to get a full hand cast and to experiment with new material. I mixed the alginate to equal parts in a jug, it took a minute of stirring to get it to a smooth texture. I then wet my hand and put it into the alginate and water mixture, it took another good few minutes for the alginate to set. After it had set I wiggled my hand out and there stood a perfect mould of my hand, I then poured plaster of Paris into it. When the plaster eventually set, I tried getting it out of the jug but the mould and cast had got stuck in the jug. So Billy the kind technician had to saw the jug apart. Oops! But in the end I got it out, I pealed off the alginate to find that the little finger and thumb had come off. I think next time I'll use a softer jug and not try to bang the mould and cast out.


19/02/2013
Mass alginate and plaster casting for photographing
I have been very busy the past few weeks making different positioned hand cast, some turning out not so good but getting better with practise. I have made the plaster thicker and the alginate thinner this seems to be working better for me. I've also cut up my own pots and tubs that I can reuse by taping them up, this makes it easier for the alginate mould to be remove afterwards. I started by mixing the alginate with water to less than equal measure into my tub, placed my hand inside and wait about two minutes or so, then remove after it sets. Then slipped my hand out and poured plaster of Paris into the mould, the time after this is boring as you have to wait for the plaster to set, it usually takes like twenty minutes or more, but I normally start another cast. I did this experimenting because I have done research on it, seen people do similar art and to help me develop for my FMP as I know I want to do some from of hand casts in my final piece.
My work.


05/03/2013
Alginate face casting
After seeing body sculptors, artists and YouTube videos in my past research, I decided to do a face cast of myself. This was also an experimenting stage for me as I have never had my face cast before, so now I know how it feels being on the other side of the casting process. I believe by experiencing this I will be able to empathize and give personal advise to other people who may sit for me in the future. I felt uncomfortable during some parts of the casting process. I particularly did not like having straws up my nose and not being able to see, but apart from these minor discomforts the finished cast was successful. My tutor and a fellow student smeared alginate all over my face, then let it set, after that they then covered the alginate with mud rock, this strengthens the alginate which makes it easier to pour plaster into it. When the plaster is fully dry you can peel away the alginate and mud rock, which then reveals a cast of your face. I was pleased with this, although the nose could of been better, which next time I'll try to improve on that part.

13/03/2013
Making a mould out of my cast
I have gone on this week to make a cast mould from my face cast as a practice, as I haven't made a full plaster mould before because I've been working with alginate. I want to use a variety of mediums to broaden my skills and experiment with different materials. I put my cast of my face that I made the week before on a board, and then put clay around the edge of the cast and covered the cast in vaseline. I had a square box made that was big enough to go around the cast and the right height to keep the wet plaster in shape and not leak everywhere. I then put clay round the edge of the box, just in case the plaster leaked, the clay makes the process more water tight. I went on poured the plaster in and had to wait for it to set, after it had set I had trouble getting it out, but after a few big bangs off someone else it finally came lose and now I have a reusable casting method. Now I have learnt this process and I'm more aware of the effects that I can achieve with it, I definitely think I will be using it in the future for specific areas of my body cast.
My work


13/03/2013
I took pictures of my hand casts in water because I was inspired to, after seeing water sculptures by Jason Decaires Taylor and a piece from the spring 2013 Saatchi gallery magazine. I decided to experiment with my hand sculptures in water to see what effects it would give them. Unlike the artist I researched I don't have a big ocean or lake, so had to make do with a tub of water. I had a light box under the tub, so I couldn't fill it to the brim, as I thought the light box wouldn't be able to stand the weight of the water. While taking the photos I changed lighting and flicked the water about to give the water movement, I have also edited these pictures on Photoshop but only colour, tone and contrast. Photoshop enabled me to experiment with altering the colour levels, enhance image clarity by making the water more visible. I chose to undergo this research as it relates to my final major project, but on a much smaller scale. I plan to submerge a cast of body parts in a transparent water container and these initial experiments allowed me to learn more about how water distorts objects and physical images.
My work.


13/03/13-14/03/13
Experimenting with different materials in my face mould
Some of the material I've been using to make casts of my face in my recently made mould looks similar to the material Magdalena Abakanowicz would use. I started with mud rock as I have seen others using it before and know how to use it, but I wanted to investigate the effects i could achieve with this material. I used Vaseline on the mould, so the cast did not stick or get stuck in the mould. Then I wet the mud rock and placed the dampened pieces into my original mould to create a reproduction of my face using this material. After it had dried I then pulled out the cast and moved on to the next one. I then decided to add some natural skin coloured paper to the mud rock to see what it would look like. The paper didn't stick as well as I would have liked, so I put a bit of PVA glue in places to help the paper stick. The effect this actually gave made me look old, as the paper had settled and made wrinkles and lines more defined. I found this effect worrying as this is how I might look in the years to come.
My next step was to try something totally different material wise, so I decided to try hot wax which turned out to be a bad idea. I heated the wax up on a full heat then when it was melted I poured it into the mould of my face. It took really long to dry and I got it stuck for about two hours before someone helped me get it out. I was poking it and cutting the edges off to try and loosen it but nothing seem to work. I found myself getting so annoyed with this process, I was ready to use a sledge hammer, however, Jamie came along and used some tools from the plaster room and it popped out. After this time consuming and ultimately frustrating experiment with wax, I don't think it is the best substance for me to cast in a plaster moulds.
I have benefited from my experimentation with a variety of mediums and have learnt things from the processes, this has helped me to decided which materials to use for my FMP. In summary, I developed three mud rock casts one with paper and two without. I discovered that mud rock is easy to apply and gives a good effect, and wax is not.
It was good to find out how other mediums work when using a mould, but I still believe plaster is the best substance for casting body parts so far, well for me anyway.
Coloured tissue paper and mud rock

Hot wax

Just mud rock.

My first casts and reproductions

14/03/13
Clay pressed mould foot print
That week I also made a mould of my foot, I started with a clay imprint of my foot, I rolled out the clay then pressed my foot into it carefully, trying not to add to much pressure, so that I didn't press to far or rip the clay. I then made a clay wall around the imprint, mixed up some plaster and poured that onto the clay. I ended up with a cast of the bottom of my foot to then go on to making a mould. I soaped up the cast with washing up liquid, then made another clay wall to hold the plaster, that I was going to pour in, when I poured the plaster into it I then had to wait for the plaster to then set. I pulled the cast and mould apart to find a nice mould of my foot to work with, I left that mould for a good few days to dry out before returning to it for reproducing my foot print in different materials.


19/03/13-21/03/13
Clay cast of face from mould
Last week I was experimenting with different mediums to help me with my FMP, so I decided to try out another material to make a cast out of the face mould, that I made a few week ago. I pressed clay into the cast after beating out air and rolling it, I also used different tools on the clay to make patterns and different markings on the clay. I made one normal clay face and the rest were more patch work of the different squares of patterned clay. I wanted to try this as I haven't really made anything clay in a while apart from making clay moulds for plaster casts. Everything was pretty simple with the clay unlike the wax in previous, I just waited until the clay was getting a bit dry then wiggled the casts out, they will be fire soon and I will be able to glaze and re-fire them afterwards, if I want to.


Foot print casting
I returned to my foot print mould this week, I made one clay tile from it because as I was going to do the second one the clay fell through the back of the cast, lesson learnt, make moulds more thicker in future. So I then went on to fix that problem by making a new mould from my cast, that I made the other week. Which didn't go to plan either because I forgot an important part of plaster poured onto a plaster cast, which is soap or Vaseline the cast before pouring more plaster onto it. That day just got worse, now I had to start from scratch again, so I did my foot print into clay again, then made a clay wall and poured plaster into it. I was sat there bored waiting for the plaster to set and doing other things, I thought I'd try and get the two I thought was stuck forever apart. I could feel the mould and cast moving, so I gave it a few bangs and a wedge, they finally came a part whole and nothing wrong with them. I did do a jump for joy at this but I don't think I'll ever forget to soap or vaseline things again. So I've learnt two things to do better next time and I won't have to go through the same problems and have to fix them.


01/05/13
Experimentation with water, jars and inks
I've had an idea for my FMP, it was to have specimen jars/tanks with hands, heads, feet in them. Kim kindly brought some coffee jars in for me, so I washed them out and peeled off any stickers. So I've used them to experiment with and to see what happens to the cast, if they are left in water for a long time. I first filled them with clear water and took pictures of them with lights, after a while I then put coloured inks in to add more effect. I slowly realised jars wouldn't fit my casts in them because of their openings, so from doing this I have learnt that jars are impractical and I will have to use tanks only for my FMP.
My work


2/5/13
After leaving the finger casts in water for a day, I then took more pictures because the coloured inks had started to make a coloured moss on the casts. I decided to leave the fingers in the water for a long time to see what will happen to them, I will update my blog with this in a weeks time.

7/5/13
I went back to my casts in a jar after a week and the coloured moss has gone even thicker, I have still left the casts in the jar and will update again in a week to see what else happens.


9/5/13
Messing with inks and my face casts
I was watching a friend do some water inking on paper and thought my casts of my face would look good with this effect on them, so I tried it on two of my casts they turned out really well but also look like bruised faces, other than that I think they look really good with that design on them. I did this because I wanted to see what would happen to the casts and what effect it would give.


14/5/13
After another week the casts have gone a bit more blue, a teacher said if you put vinegar in the jar the casts might start to break up, this is something I might try next week, if I'm not to busy with my FMP.


14/5/13
Tank, casts and reflections
I did some more experimenting with water and casts on this day, using a fish tank and water. I then photographed them. This does appear really effective, as I've said before I'm not going to use jars because hardly anything fits past the lids of them. So I have now adapted my idea to using three tanks as my final piece because the visual aspect of casts is amazing in the tank, with the reflection of the casts off the water and glass, making it seem like double vision or something. Just walking round the tank makes you see the objects in a different angle or warped. That is what I am looking for, for my final piece, as I wanted it to show how people see themselves in a critical world.


21/05/13
Casting of face for final piece
I have been casting my face in alginate again today, I want to try and cast more of my face, as I want to put them in the tanks I have sourced for my FMP. Kim covered my face in alginate but it dried half way through casting my face, so it hasn't turned out as well as expected. Although it does look like it'll be a good mould for a deformed face, so even though it went wrong, it has turned into my advantage. I shall be casting more faces for the tanks today and will update later.
29/05/2013 onwards
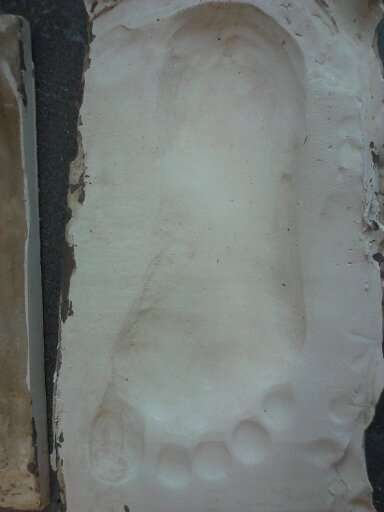
Foot casts in alginate
I decided to use the same method I have been using to do hands for my foot casts, which is alginate. I mixed the alginate as normal with a little extra water to powder into a long enough tub to fit mine and my mums foot in, I had a smaller tub for my niece, as she has tiny feet. I had trouble getting my niece to stay in the alginate until it had set but I did get two foot casts out of her. A week later I then did mine and my mums, I did the same as normal with the plaster and peeled the alginate off after the plaster had set. Although I did everything as normal there were air holes in the plaster casts, I think next time I ever do a foot cast I should bang the air out better.
All the experimentation I have done this year are linked to the artists and inspirations I have researched and looked at, such as Jason Decaires Taylor, Marc Quinn, specimen Jars, Dr. Hagens, Magdalena Abakanowicz, Adam Beane, Jaume Plensa, Mathilde Roussel and brickintheyard YouTube channel. All these artists or video channels have inspired, helped and develop me along the way to finally making my final piece.
Subscribe to:
Comments (Atom)